NDK不太常用,每次要用時都要重新翻資料找設定方法,乾脆寫一篇記錄下來。
環境設定,只需要一開始做一次:
1. 先確認 NDK 有安裝好:http://developer.android.com/sdk/ndk/index.html
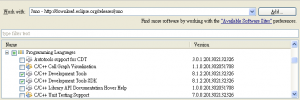
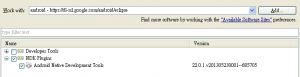
2. 安裝 Eclipse 需要的套件:
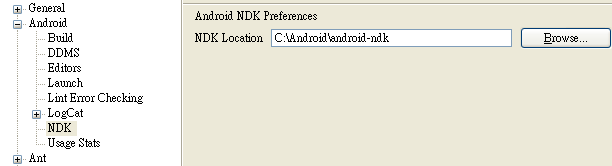
3. 設定 NDK 路徑,工具列 Window -> Preferences -> Android -> NDK ,輸入 NDK 的路徑:

專案設定,每個要使用 NDK 的專案都要做:
1. 專案上面按右鍵,Android Tools -> Add Native Support :

然後設定一個 library 的名稱:
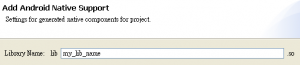
這時 Android.mk 與 C++ 原始碼檔案都幫你建立好了。
2. 設定 C++ Include 路徑,進入專案 Properties ,C/C++ General -> Paths and Symbols,加入:
|
|
; html-script: false ]${env_var:ANDROID_NDK}/platforms/android-5/arch-arm/usr/include |

${env_var:ANDROID_NDK} 是我在系統 PATH 裡設定好的 NDK 所在位置。
額外的工具:使用 javah 自動產生 .h 檔
1. 設定 Eclipse External Tools ,工具列 Run -> External Tools -> External Tools Configurations :
- Name 取一個與專案有關的比較好記。
- Location 填入 javah 執行檔的路徑。
- Working Directory 填入
|
|
; html-script: false ]${workspace_loc:/NdkProject/bin} |
其中 NdkProject 是專案名稱。
- Arguments 填入
|
|
; html-script: false ]-classpath "${workspace_loc:/NdkProject/src/}" -d "${workspace_loc:\NdkProject\jni}" com.example.ndkproject.MainActivity |
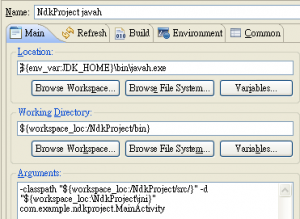
最後的 com.example.ndkproject.MainActivity 是要使用 NDK 的類別的 fully qualified class name 。(若是在 Linux 底下,classpath 要改成 ${workspace_loc:/NdkProject/bin/classes})
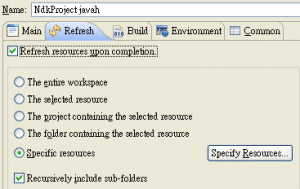
- 切換到 Refresh 分頁,勾選 Refresh resources upon completion ,使用 Specific resources 選項,在右邊選擇 jni 資料夾
2. 在需要呼叫 NDK 的 Java 原始碼中加入程式,用來載入 library 並定義原生函式:
|
|
; html-script: false ]public native String myNdkFunction(); static { System.loadLibrary("mylib"); } |
3. 按下工具列的 Run -> External Tools -> 剛剛設定的 javah ,即會幫你產生 Native 用的 .h 檔案。
可能遇到的問題
1. 出現警告: Android NDK: WARNING: APP_PLATFORM android-14 is larger than android:minSdkVersion 8 in ./AndroidManifest.xml
解決方法:在 jni 資料夾中新增 Application.mk 檔案,指定 SDK 的版本
|
|
; html-script: false ]APP_PLATFORM := android-8 |
以上都設定好,就會看到每次執行 debug 時,會自動使用 ndk 編譯了。